
|
||||||||
The Figure Four TrapMy first trap, the figure four trap (also known as the figure four deadfall trap) is featured in most of the survival how-to books. Also it is in the video(s) by Ron Hood (www.survival.com), the "Traps and Trapping" video and the "Survival Basics" video and possibly others. Here I have shown photos of my construction of this trap. There are three straight pieces of wood, and seven cuts, to make the standard version of the figure four trap. The three pieces are referred to here as the vertical, the diagonal, and the trigger (which is horizontal). See the final picture at the end of this page. Use the thickest piece as the diagonal. In my version each piece is about one foot (30cm) long (actually the trigger piece, the thinnest, is longer than that, more like 45cm). The wood was from a dead gum tree branch I found in the backyard. The particular advantage of the figure four trap is that it does not need cordage. I used my chisel (see the Getting Started page for a picture) for most of this work. You could also use a sharp and strong knife. The chisel was easier on my hands. For the notches, I used the saw on the Swiss army knife, and the chisel. Be sure always to cut away from yourself!
To cut a notch quickly, I used the saw of the Swiss army knife to cut the short edge of the notch. That is, the cut that goes straight into the wood, not at an angle. Then I used the chisel to make the angled cut, cutting towards the first cut.
The whole set of cuts can be memorised in this way: The first cut is a flat edge, then the notch that that edge will fit into. Then another flat edge, then its respective notch. Then the square edge (cuts 5 and 6) and then finally its notch (cut 7). So it goes edge, notch, edge, notch, edges, notch. To make the figure four trap more sensitive, you could make a further cut (that would be cut 8), which would be to cut away the square edge (on the vertical piece) below where the trigger notch will fit, going all the way down to the bottom of the vertical. Then the trigger notch will only be able to mate with the vertical square edge in one place—and any downward disturbance of the trigger will trigger the trap, whereas it might not have without this extra cut. This cut has not been made in my photographs of the trap. Overview of Animal Foods cut edge figure four notch piece trap trigger vertical Content is copyright © Survival.org.au 2005-2026 All Rights Reserved. Terms of Use. Definitely read the disclaimer before trying anything from this website, especially including the practices and skills. This website uses affiliate links – this doesn't cost you any more, but I get a commission on purchases made through the website. As an Amazon Associate I earn similarly from qualifying purchases. |
||||||||
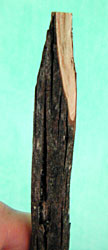 This is the first cut, a two-sided flat edge on the vertical
piece.
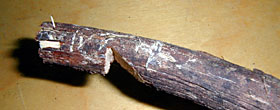 This
is cut two, the notch at the top of the diagonal. I made mine too
close to the end of the piece (that
is, too close to the top of the trap, when it is assembled). That
means that my trap could fail, because the rock or log used as the
weight
might
land
on the
vertical, and not fall any further. Yours should be made a bit further
along the piece.
 This is cut three, a flat edge at the tail of the diagonal. The flat edge
and the notch at the top (the previous cut) should be in the same
plane, that is, both will be aligned horizontally when the trap is
assembled.
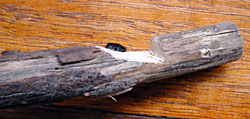 Cut
four is a notch at the end of the trigger piece.
 Cuts
five and six are two flat faces cut into the bottom of the vertical
piece, going all the way to the bottom. This creates a square edge
(i.e. a 90 degree angle), that the notch on the trigger (cut seven)
will fit into. These cuts need to be made in the correct
orientation—see
the picture below.
 Here
is the completed vertical.
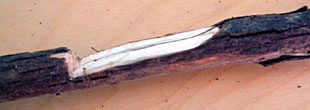 Cut
seven is a long shallow notch cut into the trigger. This is the point
that will hold the whole trap together when it is assembled. When
the trap is set up, and then disturbed (hopefully by the animal you
are intending to trap), this notch will be pushed away from the square
edge of cuts 5 and 6, and the whole thing will fall down.
 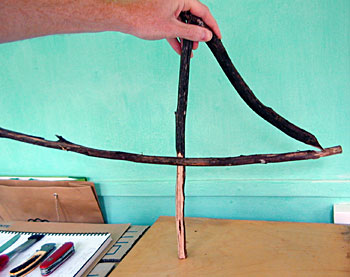 This
is the complete figure four trap. Where my hand is, you would place a large rock
(e.g. a 35 kilogram rock) big enough so that part of the rock rests
on the ground, and part on the top of the trap. When triggered (by
an animal disturbing the trigger piece), the whole thing will fall
down, the rock crushing the animal. You could also use a fallen tree
log, placing one end on the top of the trap.